Part 1: Setup Your Own Website
So much is happening on the internet! You can keep up with your friends, watch movies, run a business, and read about anything you want! While most people are consumers of the internet, this series of posts will help you get started building your own website hosted for free using GitHub pages.
If everything goes smoothly, in a few minutes you will have complete control of a fully functional website.
What This Series Covers
- How GitHub helps you find other projects
- How GitHub helps you manage your own projects
- How to publish a blog post
- An overview of how HTML and CSS work
What This Post Covers
- Sign up for GitHub
- Forking a GitHub repository
- Serving the files in your repository as a website
- The types of files you might encounter
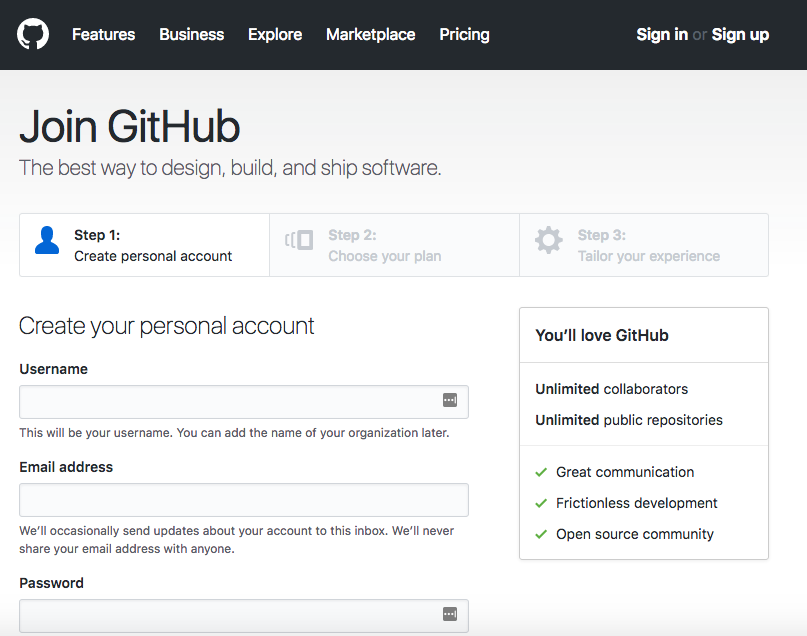
Step 1: Sign Up For a GitHub Account
GitHub is a platform for developing projects and managing them as they grow. You will need to sign up for an account if you don’t have one already.

Before starting up your blog, you will need to verify your account through the email GitHub sends to the address you used to sign up. Click the appropriate link in that email.
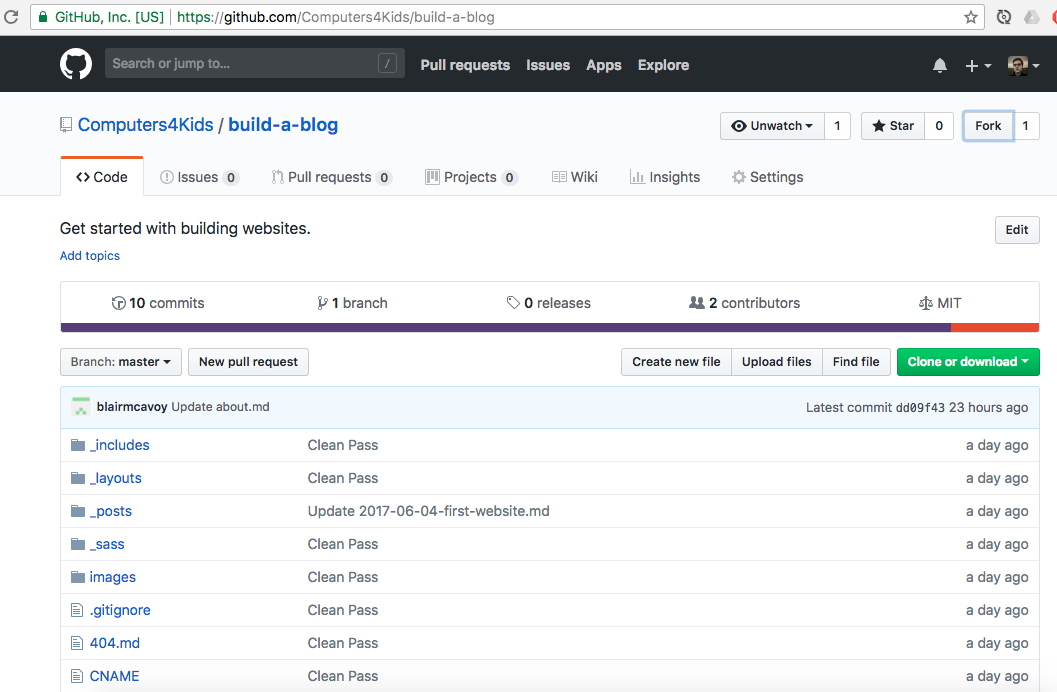
Step 2: Fork the build-a-blog Project
Fork is a term that effectively means to copy. Forking someone else’s project repository will create a new repository that you have full control over.
C4K’s build-a-blog repository is located here.

Click the fork button to get your copy. This will take you to your new repository when GitHub is done setting it up.
Step 3: Tell GitHub your repository is a website
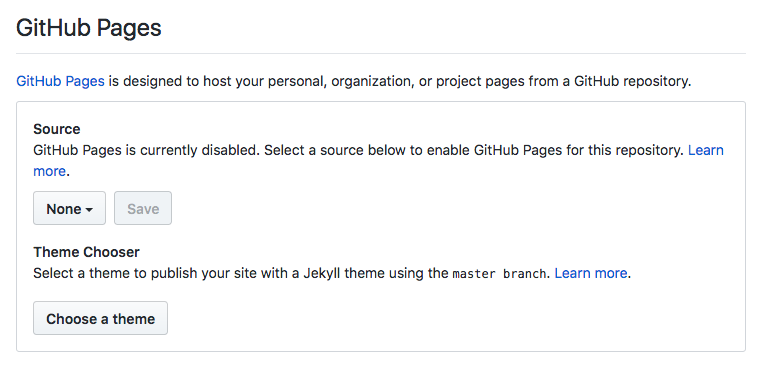
Hosting websites is just one kind of project GitHub can be used for. We have to tell it this project is a website. Click the settings tab on your repository page and scroll down to the GitHub Pages section.

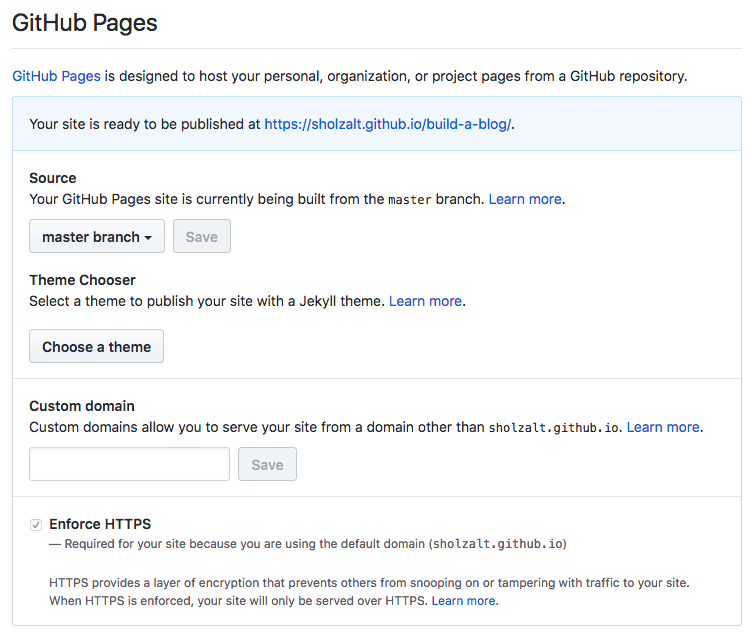
Under Source, click where it says None. Set the source to master branch, then click the save button. If everything goes smoothly, the page will refresh. You can scroll down to find a link to where the website you control is live (you can change the address here later too if you like).

Step 4: Explore the default website a bit!
Both the files in the repository and what you find at the link. It’s ok not to know how everything works just yet!
Getting familiar with where things exist is the first step to learning what things do. Try to find these specific file types before moving on:
- HTML: describes the content on a page and how it is organized. Things like words, images, boxes, and buttons.
- SCSS (CSS): describes how content on a page is displayed. Things like color, fonts, and spacing.
- MD (markdown): Markdown feels like magic. You’re still describing how content on a page should be like HTML, but without having to worry about those tedious tags all the time unless you want to. GitHub converts markdown into HTML when serving your site.
- YML: Known as Yet Another Markup Language or YAML Ain’t Markup Language for somewhat humorous reasons. There’s only one of these, but it’s an important one for managing your website.